Hey all, just thought I’d share my idea for Miscers who may be building a home gym and need a way to store their bumper plates . It’s funny as others on YouTube have posted something similar to my bumper rack concept , but I got this idea over a decade ago .
Basically you purchase 1” floor flanges and 1” gas pipe that threads into the flanges . In my case I was lucky , as I had access to really thick heat shrink that we use for our connectors we used in the telecommunications industry.
It’s handy as it eliminates any sharp edges at the end of the pipe after it’s cut , but if I was more experienced at welding , they do make these half moon cups that could be welded on the tips .
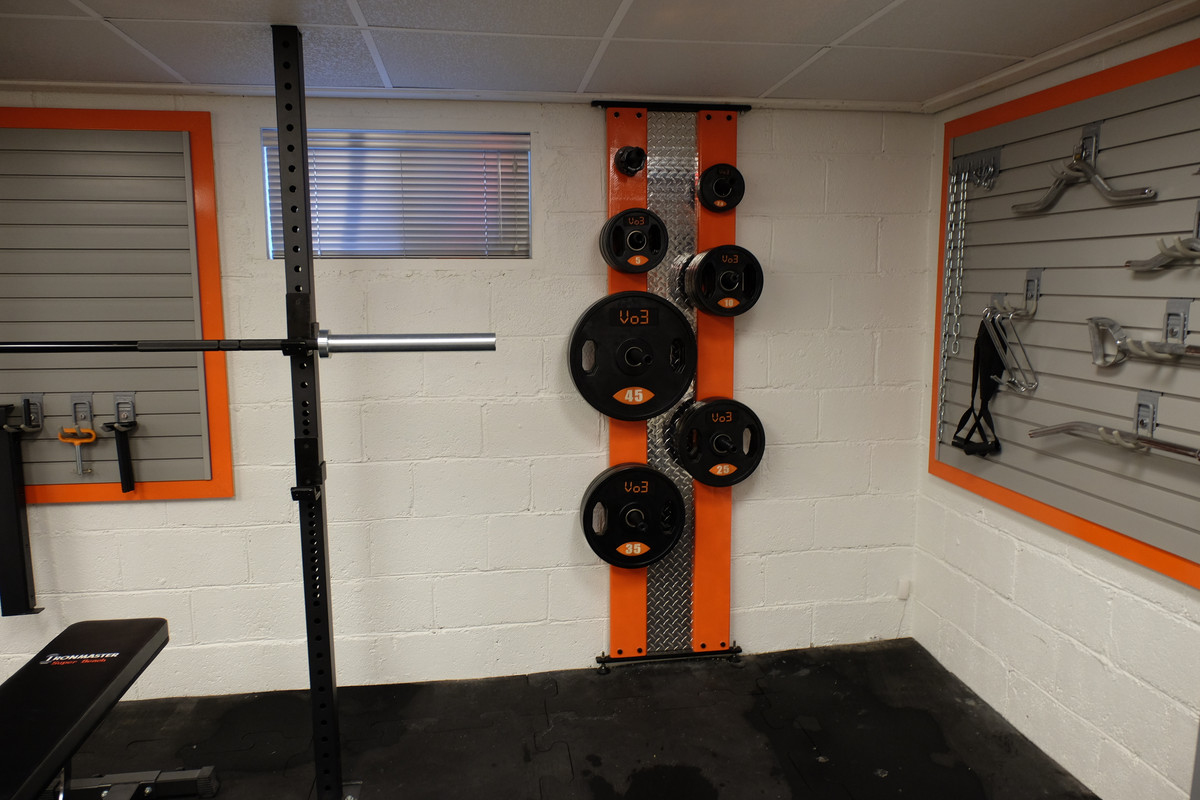
You’ll notice there’s some additional holes . That happened because originally my first iteration had the bumper plates going numerically,but I found putting the 45 back on the lower post was a pita , so I did a respace and put the 45 above the 35 . Worked perfect after that , as the 45 is in the perfect position to remove and replace

here you can see the threaded end . The floor flange is secured with 4 1/4” bolts that go through the 2/6 wood .

The first gen I just attached a 2/4 bottom and top , then put screws threw the top onto a piece of wood on the ceiling

But later I used 1/4” steel to the bottom and top and tapped out 1/4” holes for adjustable feet and bolts on the top

The finished product
Basically you purchase 1” floor flanges and 1” gas pipe that threads into the flanges . In my case I was lucky , as I had access to really thick heat shrink that we use for our connectors we used in the telecommunications industry.
It’s handy as it eliminates any sharp edges at the end of the pipe after it’s cut , but if I was more experienced at welding , they do make these half moon cups that could be welded on the tips .
You’ll notice there’s some additional holes . That happened because originally my first iteration had the bumper plates going numerically,but I found putting the 45 back on the lower post was a pita , so I did a respace and put the 45 above the 35 . Worked perfect after that , as the 45 is in the perfect position to remove and replace
here you can see the threaded end . The floor flange is secured with 4 1/4” bolts that go through the 2/6 wood .
The first gen I just attached a 2/4 bottom and top , then put screws threw the top onto a piece of wood on the ceiling
But later I used 1/4” steel to the bottom and top and tapped out 1/4” holes for adjustable feet and bolts on the top
The finished product
Comment